

Table of Contents
- Browsing proteins
- Editing proteins
- Protein identity check
Demo client guide
When you start the demo client it will show you all the protein entries registered in the demo database.
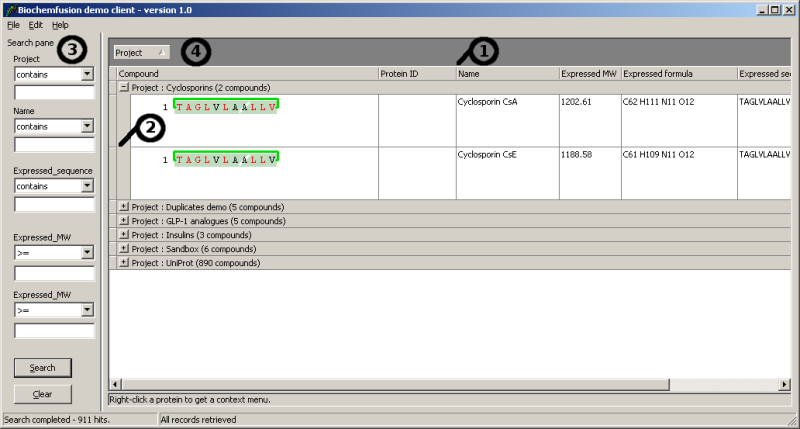
Clicking a column header sorts by that column. Column widths can be changed by dragging the column boundaries (1) and row height can also be adjusted by dragging the row borders (2). To the left (3) you can do simple searches on project name, protein name, sequence and molecular weight.
Using group-by
Each entry is associated with a project name and per default the demo client groups entries by project name (4). You may group entries entirely as you please by dragging columns around as shown below.
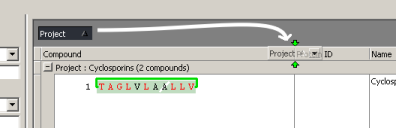
Un-group by project by dragging the "Project" column down.

Group by formula by dragging the "Expressed formula" column into the group-by box.
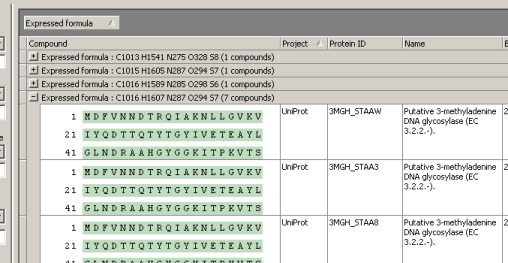
Formula-identical entries are now grouped together.
Working with individual entries
Right-clicking any protein entry will bring up a context menu.
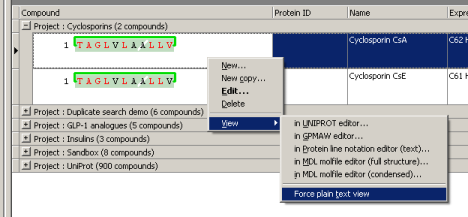
Entries can be viewed in any of the supported formats: UniProt, GPMAW, PLN and MDL molfile (full-structure or condensed format). The demo client will save the protein as a temporary file with a format-specific extension and ask Windows to open that file. This means that when you want to view e.g. a molfile, the molecule will be displayed in the application that is currently associated with ".MOL" files in Windows.
If you don't have an application registered for the file type in question the demo client will open the file as plain text using Notepad. To inspect all output as text you may force the demo client to always use Notepad by checking the menu item "View->Force plain text view".
Double-clicking an entry or selecting "Edit" from the context menu will let you edit the entry.
e-mail: -
Phone: +45 30 48 00 50 - Copenhagen, Denmark
© 2008 - 2013 Biochemfusion Holding ApS. All rights reserved.
Windows® is a registered trademark of Microsoft corp. and its affiliates - MDL® is a registered trademark of Symyx Technologies (now Accelrys)